Showing posts with label Glitter. Show all posts

Thursday, January 30, 2014

OPI 18k Gold Top Coat

Ok so I know The Man With the Golden Gun came out last year, but a friend of mine recently gave me the OPI 18k Gold flakie top coat from the James Bond Skyfall collection, and I absolutely love it!  I especially love the fact that it sits in an extra-thin suspension base so you can add several layers of gold flakes to your manis without it getting to thick or clumpy.


It comes in a fancy box AND a fancy bottle!!  Isn't it just so glam?!  So I tried it out last night over 2 coats of Zoya's Louise and I am very happy with the results.  I used my Northern Lights holographic top coat in gold to complement the design


This picture doesn't even do it justice.  Being actual 18k gold flakes, it's a lot shinier and more sparkly in person.  I know it's decadent and you could probably find a cheaper dupe, but it sure is nice to say that you have solid gold nail polish :)

I'm thinking this would look especially gorgeous over a deep turquoise.  I think I'll try that out when it's seasonally appropriate.

So what do you think of the 18k gold top coat?  You think it's worth the current retail price of $69?


Tuesday, December 17, 2013

2013 Holiday Nails #2

I love this Holiday color from OPI.  It's called Wondrous Star and it's from the 2013 Mariah Carey Holiday collection.  It features a micro glitter base that is somewhere between silver and gold with chunky black glitter throughout.  Love the formula and the outcome!


Monday, October 28, 2013

Disney Villains Polish Set by e.l.f.: Maleficent

At Walgreens the other day, I picked up the Disney Villains polish set by e.l.f.  The collection comes with twelve different polishes divided into threes (the four villains include: Maleficent, Cruella, Ursula, and the Evil Queen from Snow White).  These 3 polishes are from the Maleficent collection:

The colors include:
"Maude Mauve" (pointer and pinky finger)
"Bubble Gum Pink" (thumb and ring finger)
"Gina Girl" (middle finger)

I really love all the colors in this collection, and each of them applied with a smooth, creamy, and rich texture.  I probably could have only used one coat on the pink and mauve, but I went ahead and did two.  The glitter color in the middle took about 4 coats for full coverage, but it wasn't clumpy or goopy at all, which is nice in a glitter formula.  It's kind of hard to tell, but the glitter has a brownish-purple base with purple, gold, and orange mixed glitters.  I never would have thought to pair these three colors, but e.l.f. did a great job with this combination!  Can't wait to use the other three villainous collections.

You can purchase this set at Walgreens for $9.99 USD, which is a great deal for 12 polishes.  They're not full sized bottles, but they're not as small as minis either.

Sunday, October 27, 2013

Shot of the Day: 2013 Halloween Nails #4

This is one of my favorite looks I've done so far this season:


For this look, I used 'Where Art Renoir?' by Finger Paints, which is a really smooth, creamy formula with fine silver glitter.  I stamped with a Sally Hansen white.


Pretty witchy, right?

Wednesday, September 18, 2013

Shot of the Day: Bejeweled Barbie Mani

I recently purchased a bottle of China Glaze's "You Drive Me Coconuts" and I absolutely adore the color.  Usually I'm not into so much Barbie pink, but when I added a layer of Essie's "A Cut Above,"  the glam factor skyrocketed as you can see:


It's so fancy, I'm calling it my Bejeweled Barbie look.  Well, I guess I still can't decide between bejeweled or bedazzled.  Either way, it's pretty fabulous!

Monday, August 19, 2013

Shot of the Day: Galaxy Nails

Hey y'all!  Hope you had a great weekend.  Now that my husband and I have finished moving into our new place, I have been seriously trying to restore my pitiful, chipped and broken nails.  Now that I've got them looking decent again, I thought I'd celebrate with one of my favorite looks - the galaxy mani.  Here's a picture taken in natural lighting:


For this look, I used Nina Ultra Pro's Purple Xing as a base color, which worked great because this particular shade includes fine-medium multi-color glitter which really adds to that "deep space" look.  Next, I used a cosmetic sponge to dab on the little galaxies.  I outlined each little nebula in white first, then added depth and color with layers of pink, yellow, and dark blue.


Next, I used Essie's Set in Stones to add the little "stars, and then I finished by adding a coat of Out the Door's Northern Lights Hologram Top Coat in Silver.  And by the way, this was my first time using this particular top coat, and let me just tell you how wonderful it is, especially for a look like this.  Just like Out the Door's other top coats, Northern Lights dries quickly and offers great nail protection, but it also adds a subtle holographic shimmer, which kind of gives a 3 dimensional impression.  I will definitely be purchasing Northern Lights in Gold.  Anyway, here's the galaxy look in darker lighting, which really seems to glow with this top coat:


And remember, this is what it looks like in a brighter setting:


Pretty amazing, huh?  I must say, I'm quite proud of myself for pulling this off so well.  I did take me nearly two hours, but I think it was worth it.  What do you think?

Wednesday, July 3, 2013

Happy 4th of July

So, I couldn't decide what to do for my patriotic manicure (there are sooo many options), so I just decided to do a little bit of everything.  Here's my left hand:
 And here's my right hand:

I've got glitter gradients, polka dots, stamps, and rhinestones...I feel like Uncle Sam would be proud!  It's too much product to catalog here, and I honestly can't even remember everything I used for this look, but it's pretty great, huh?!

Anyway, I hope you all have a safe and wonderful holiday! Happy 4th of July!

Monday, May 13, 2013

Shot of the Day: Gatsby Inspired Nails

Have you all seen the new Gatsby movie yet?  I haven't had a chance so far, but I'm a big fan of the book!  Anyway, I am loving all the Gatsby nail trends I'm seeing these days, so I thought I'd do a Great Gatsby manicure of my own! I wanted something very deco but also super sparkly, so I used Urban Outfitters Smokin as my base color:


This picture doesn't do it justice.  This polish is so glittery and sparkly, and it keeps that wet look, which really makes it shimmer in certain lights.  It usually looks like this champagne-gold color, but in certain fluorescent lights it looks more silver.  This polish also had one of the best applications of any glitter I've ever used, so guess what I did!  I went back to Urban Outfitters and bought a bunch more of their glitter polishes.


For my Deco stamp, I used Winstonia plate W111, which applied really well!  This black is probably my favorite black stamping color and it's from the Forever 21 Red Carpet Kit.


This photo was taken under fluorescent lights, and it definitely looks more silver here than gold.  I got so many compliments on this manicure, and it really popped with the black and gold accent jewelry I wore.

For this look, I used OPI Nail Envy as a base coat and Seche Vite as a top coat.  So what do you think?  Pretty fancy, huh?


Sunday, April 21, 2013

Shot of the Day: Celebrating with China Glaze (Champagne Bubbles) and Gold Glitter

Well, I found out this week that I passed my comprehensive exams for my graduate program so I am celebrating the fact that I will have my master's degree in just three weeks!  I wanted to make my nails fit my mood, so I thought China Glaze's Champage Bubbles would be a perfect base for a sparkling celebration mani!


The gradient isn't perfect, but it sure does shine!  I used a base coat of OPI Nail Envy, then I used China Glaze Angel Wings as my first glitter layer toward the tips.  Angel Wings is a gold/green fine glitter with slightly holographic undertones. My second coat was Color Club's Gold Glitter, which is a slightly chunkier glitter that is very pigmented, and it has an amazing application.  It's very smooth and offers pretty full coverage.


The final coat I used for this glitter gradient look was Nicole by OPI's Kissed at Midnight.  It is a part of the Selena Gomez collection and it's one of my new favorite glitters.  The application is comparable to Essie's Luxeffects glitters.  It has a clear base with various sizes of gold round glitter, which are plentiful and easy to apply with the brush.  I seriously love this glitter and I will definitely be buying more glitters from the Selena Gomez collection!  It isn't goopy and thick like most highly pigmented glitters, and I think it added the perfect touch to my champagne celebration nails!


I used Seche Vite as my top coat.  I love this top coat with glitters because it makes your nails smooth to the touch, not grainy or bumpy, which happens a lot with glitters.  Anyway, I think it's time to get this party started.  I'll begin by mixing a pitcher of Sangria!


Monday, April 15, 2013

Welcome!

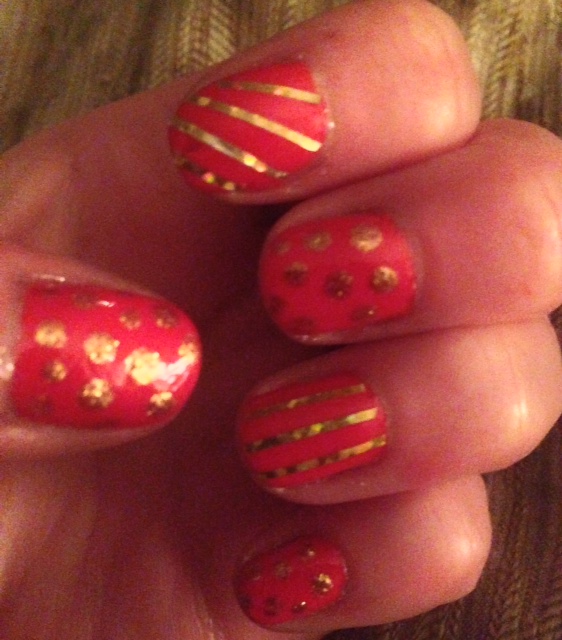
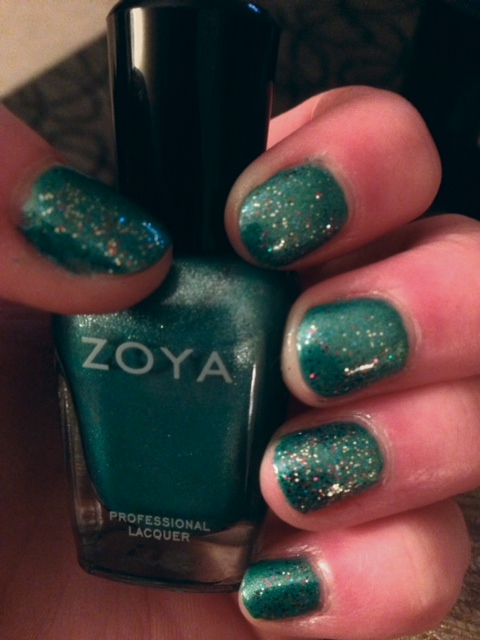
As I mentioned in the About page, I'm here to blog about two of my favorite things - nail polish and cocktails.  I've been a book blogger for years, but I recently decided to join the nail blogging world and it's really exciting.  I'm not completely sure how I'm going to organize this site yet, but I will definitely be posting pictures of my manicures, which will include lots of glitter and polka dots by the way, as well as nail polish reviews and swatches.

 I'm a big fan of China Glaze, Essie, Kleancolor, OPI, Revlon, Orly, and Sinful Colors polishes, but I'll wear almost any drugstore brand if the color catches my eye.  I haven't delved into the realm of designer polishes yet, but I'm hoping my graduate school budget will allow for a few polish splurges here and there.  And just to start things off on the right hand, here are some sample photos of my most recent manicures.  In the future, I will improve my photography methods and post the base coat, polish names, etc.  Also, please be patient with my cuticles...Enjoy!